


CRACK is a first-person adventure and incremental simulation game that is both developed and published by Rafoli. The game released on October 26, 2026, for Windows PC and allows up to 4 players to play in co-op.
CRACK tasks you with excavating a giant mysterious egg inside an equally mysterious laboratory, selling the recovered resources from the egg to improve your equipment, and uncovering the buried secrets of the facility. While the game is designed around a 4 player co-op, you can also enjoy the game by yourself.
The game combines excavation, resource management, exploration, and automation all revolving around the egg. As you progress through the game, you will eventually unlock better tools, discover the deeper layers of the egg, and trudge through hazards that will stall your progress. The facility hides secrets that you can find to eventually get the alternate ending.
This walkthrough covers the main progression mechanics, and everything else that you need to know about CRACK, including the two endings.
CRACK: Progression roadmap
CRACK offers a straightforward progression loop. Follow the general order of progression to fully understand the basic mechanics of the game. The game provides a clear objective list, making it easier for you to progress. The objectives also include what you will unlock upon completing them.
Here’s how you should progress in CRACK:
1) Complete the introductory section of the game and begin working on the gigantic egg.
2) Collect the excavated resources and sell them for early profit.
3) Upgrade your basic tools and see how deep into the egg’s layers you can open.
4) As soon as you have enough money, invest in unlocking the Mk 2 Shovel to excavate tissue.
5) Keep collecting tissues until you have enough money (around $70) to unlock the Workbot Storage.
6) Invest in automating your collection and transportation systems by purchasing Collector Bots and Delivery Drones.
7) Upgrade your Workbots and use vehicles to increase productivity.
8) Manage the egg reaction immediately at the designated terminal to avoid your scaffoldings breaking down.
9) Craft Scaffoldings to reach up to the ventilation above the breakroom.
10) Collect the UV light and find the hidden messages spread across the facility. Then investigate all secrets and restricted areas. After that, you can pursue either of the two endings of the game: The Specimen Processing ending or the secret escape route ending.
CRACK: Full game walkthrough
After you have completed the introductory briefing, follow the first objectives in the main excavation area. Once you are past the shutters, the gigantic egg descends. Each of the four players will have a named keycard which grants them access to terminals, shops, and any other facilities of the laboratory. Near the egg, you will also find a terminal that monitors the agitation levels of the egg. If you repeatedly excavate any area of the egg, it will begin to agitate.
The game follows a shift-based structure, and after every shift you will be given time to rest and enjoy some side activities.
Here’s how you excavate the gigantic egg:
1) Start with the outer shell
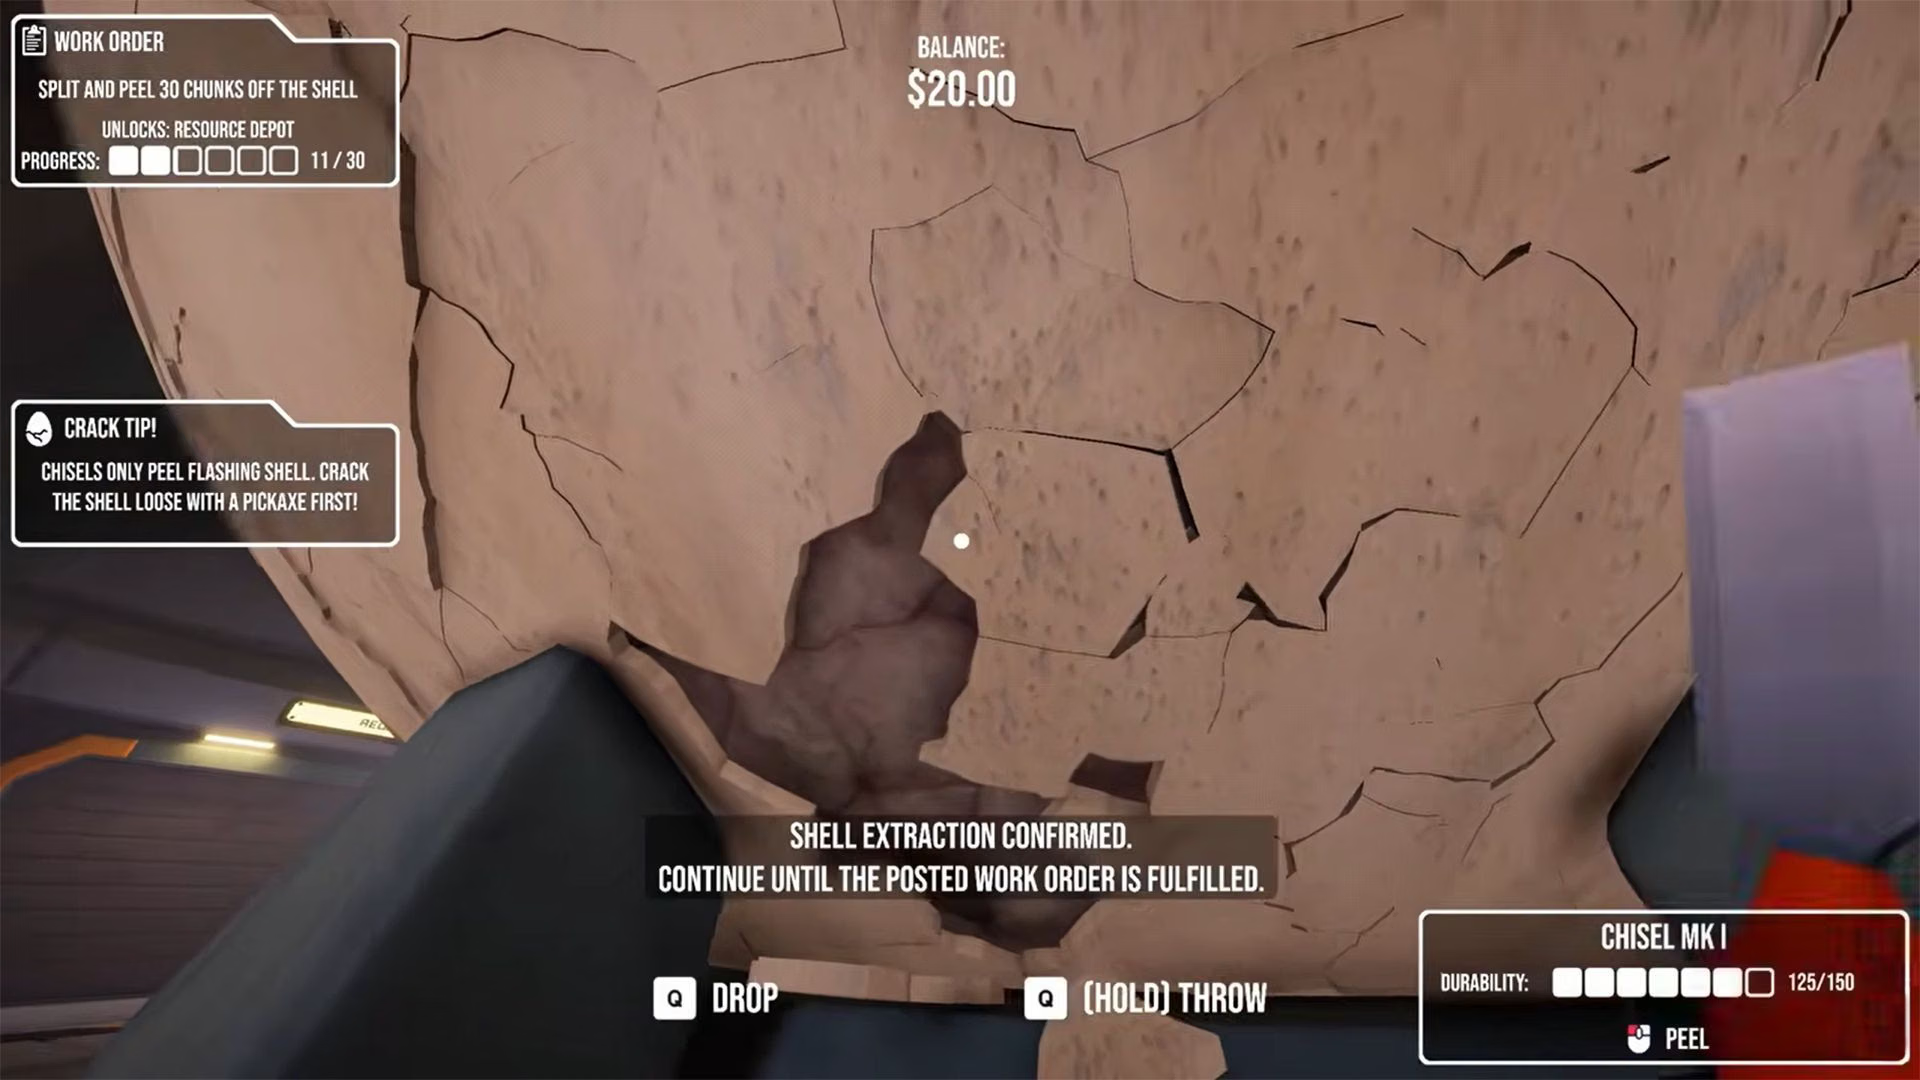
To start with your task, pick up the starter pickaxe to break the egg’s outer shell and the chisel to peel off the broken pieces.
Pick up the buckets from the conveyor belt in the Resource Depot and carry them over to the broken pieces to pick them up. Once you have picked up the pieces, deliver them to the conveyor belt to start earning profit. You can also throw the buckets (even when they are full) to further hasten the delivery process.

Each Mk 1 bucket of outer shell will give you $9. Invest the money into tools to excavate further into the egg.
Note that, if you are playing CRACK in co-op, every player will earn individually.
2) Upgrade your tool to start digging deeper
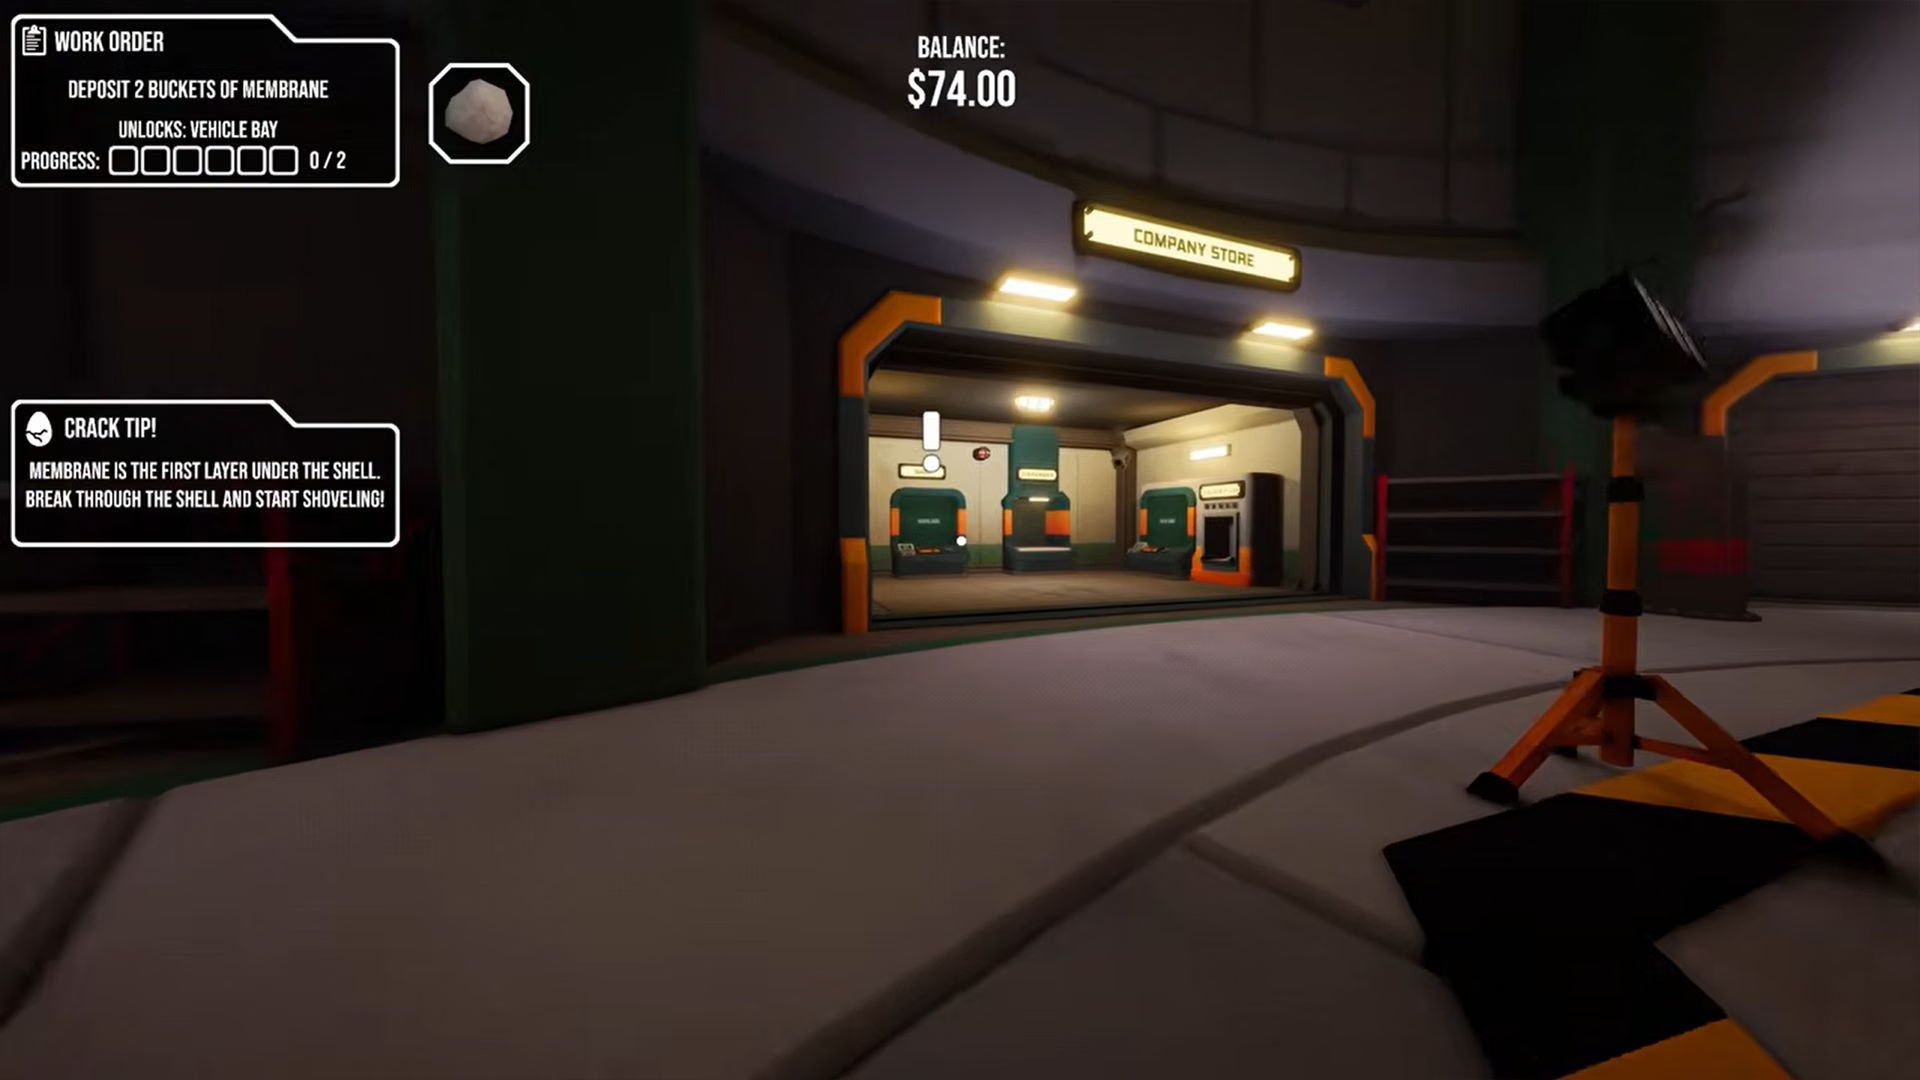
Once the outer layer is excavated, you will need to acquire the Shovel to dig through the Membrane, which is the next layer of the egg in CRACK.

The Mk 1 Shovel can be purchased at the Company Store for $13. Add the item to your cart and then complete the minigame at the terminal to purchase it.
Once you have the Shovel, return to the egg and start digging through the greyish matter beneath the white outer shell. Grab the buckets and start delivering the Membrane fragments. Each bucket of Membrane will give you $15, significantly improving your funds.
Don’t spend all your money right at the start, as Tools in CRACK will wear down with each strike, meaning you will have to upgrade them or replace them often.
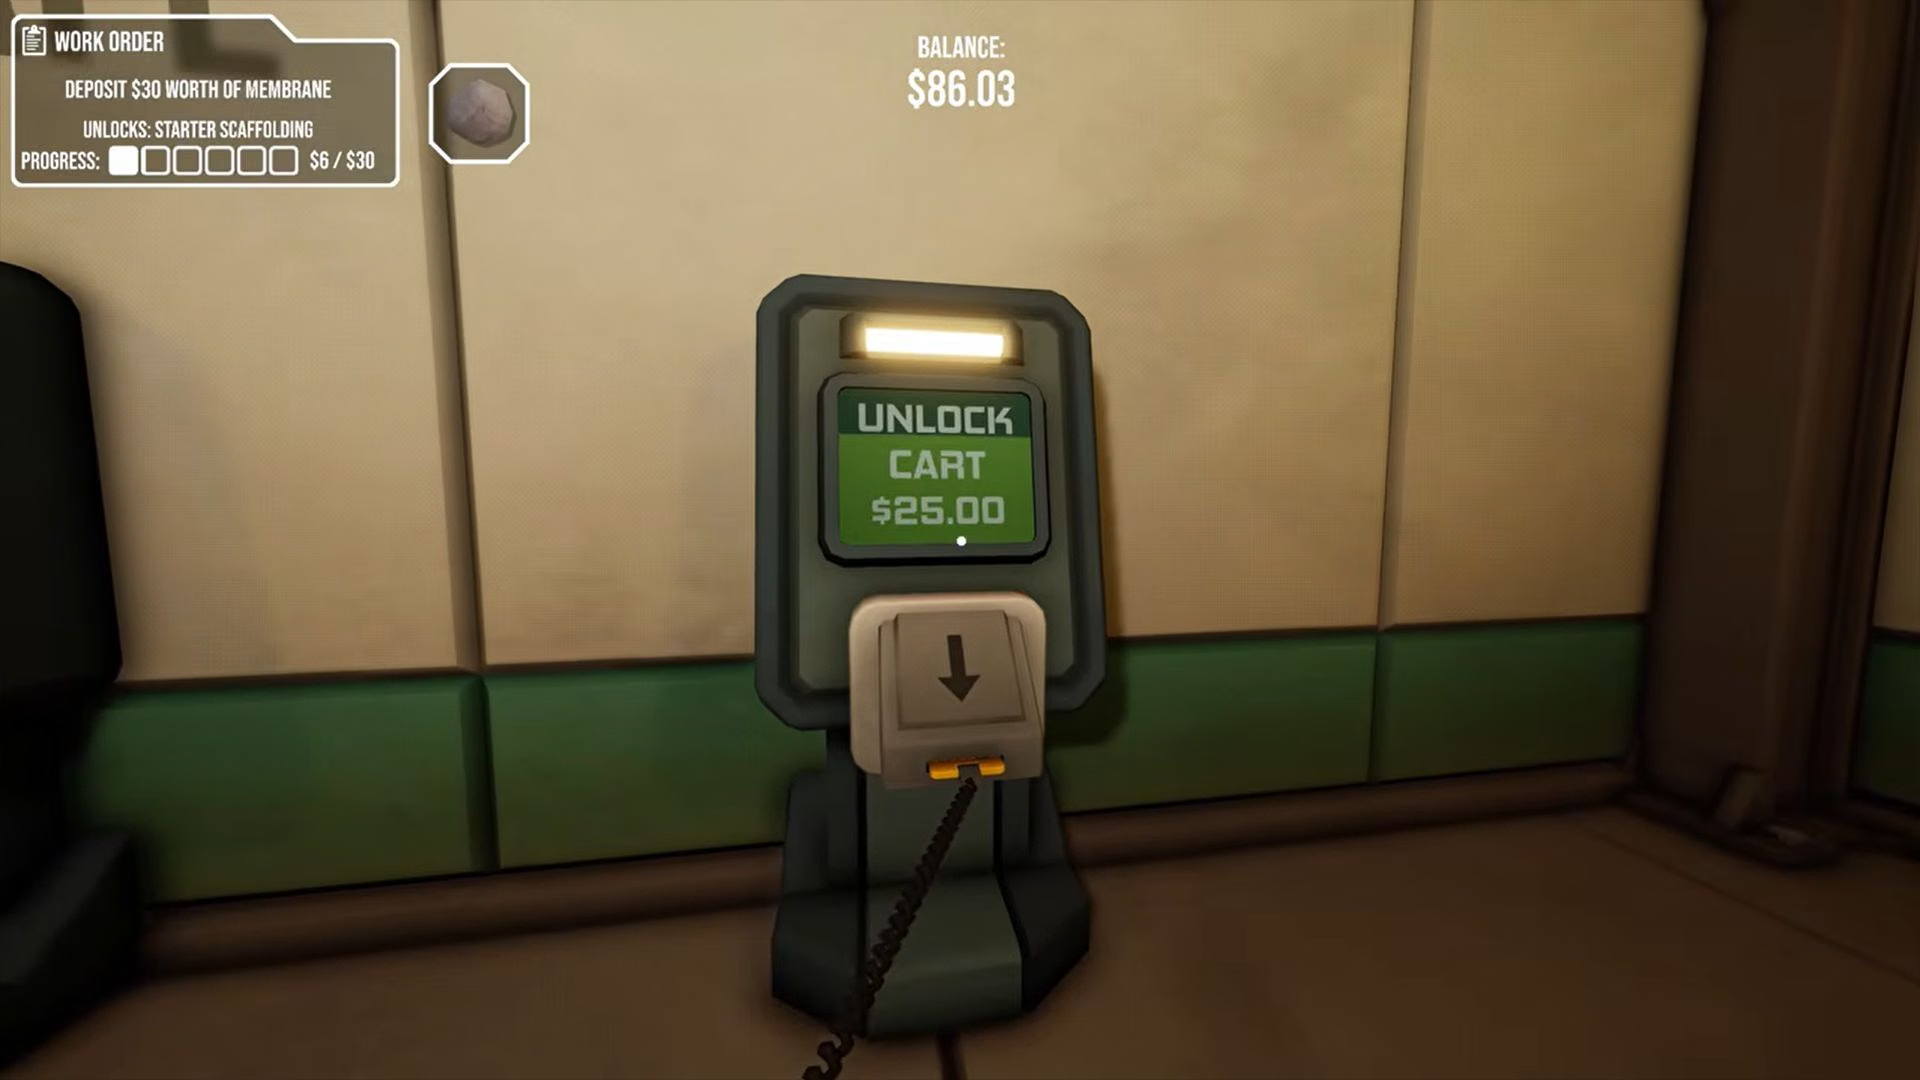
Although Vehicles become available to you fairly early on, they are not recommended right at the start of CRACK. It costs you $25 to unlock vehicles. Only if you are playing in a 4 person group can you afford to get the vehicle early on.
But as soon as you have enough money from excavating the membrane, purchase it and eventually upgrade it to carry more buckets and tools.
3) Watch for Specimen agitation
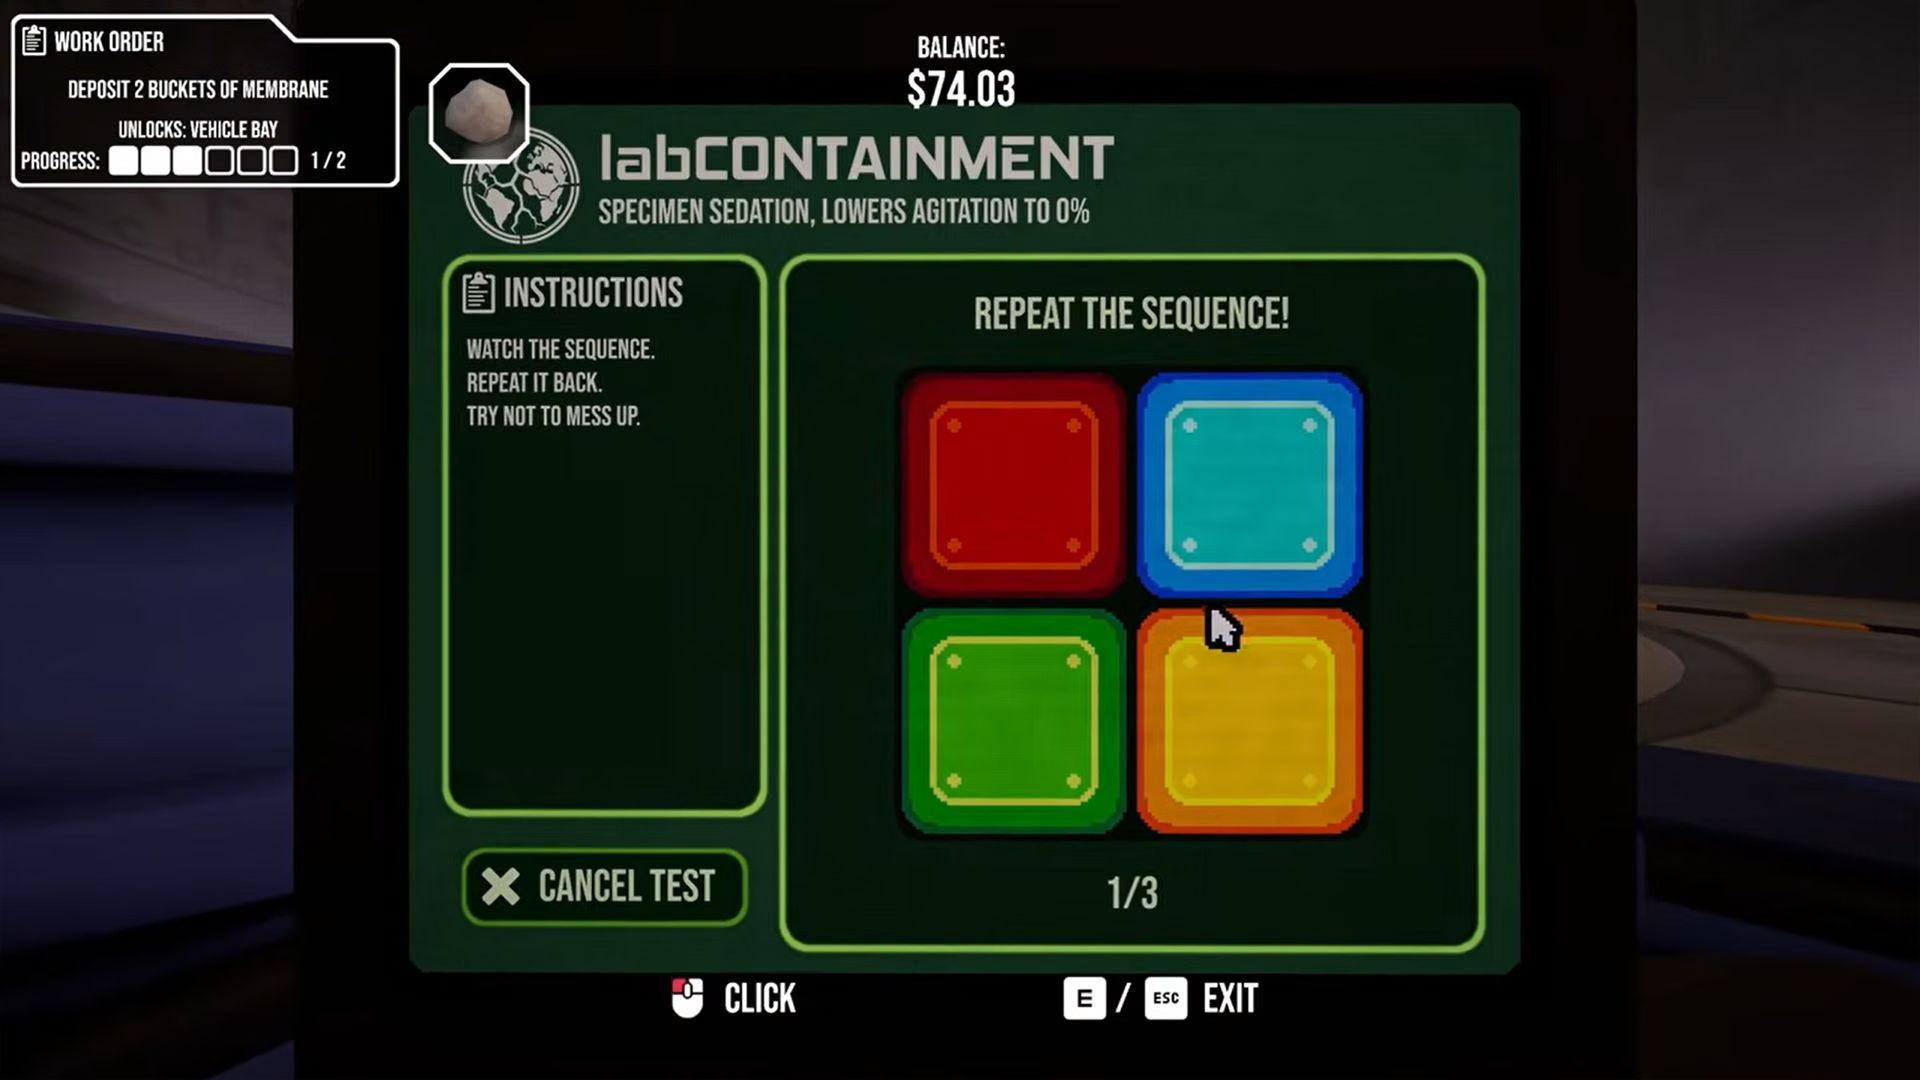
Often while excavating the egg in CRACK, you will get an agitation alert. This means you will need to rush to the Sedative Application Terminal. To apply the sedative, you will have to successfully complete the mini game.
4) Excavate the Membrane to reach the Tissue layer (unlock Workbot storage)
Follow through the objectives like excavating and depositing Blight and Calcified Nodules, and gradually upgrade your Tools and transport vehicle to Mk 2 or possibly higher.

Additionally, craft some decent amount of scaffolding around the egg to excavate further up. Make sure they are well built with proper support, or you will risk them falling apart. Additionally, scaffoldings can break if the Specimen gets agitated and the environments begin to react.
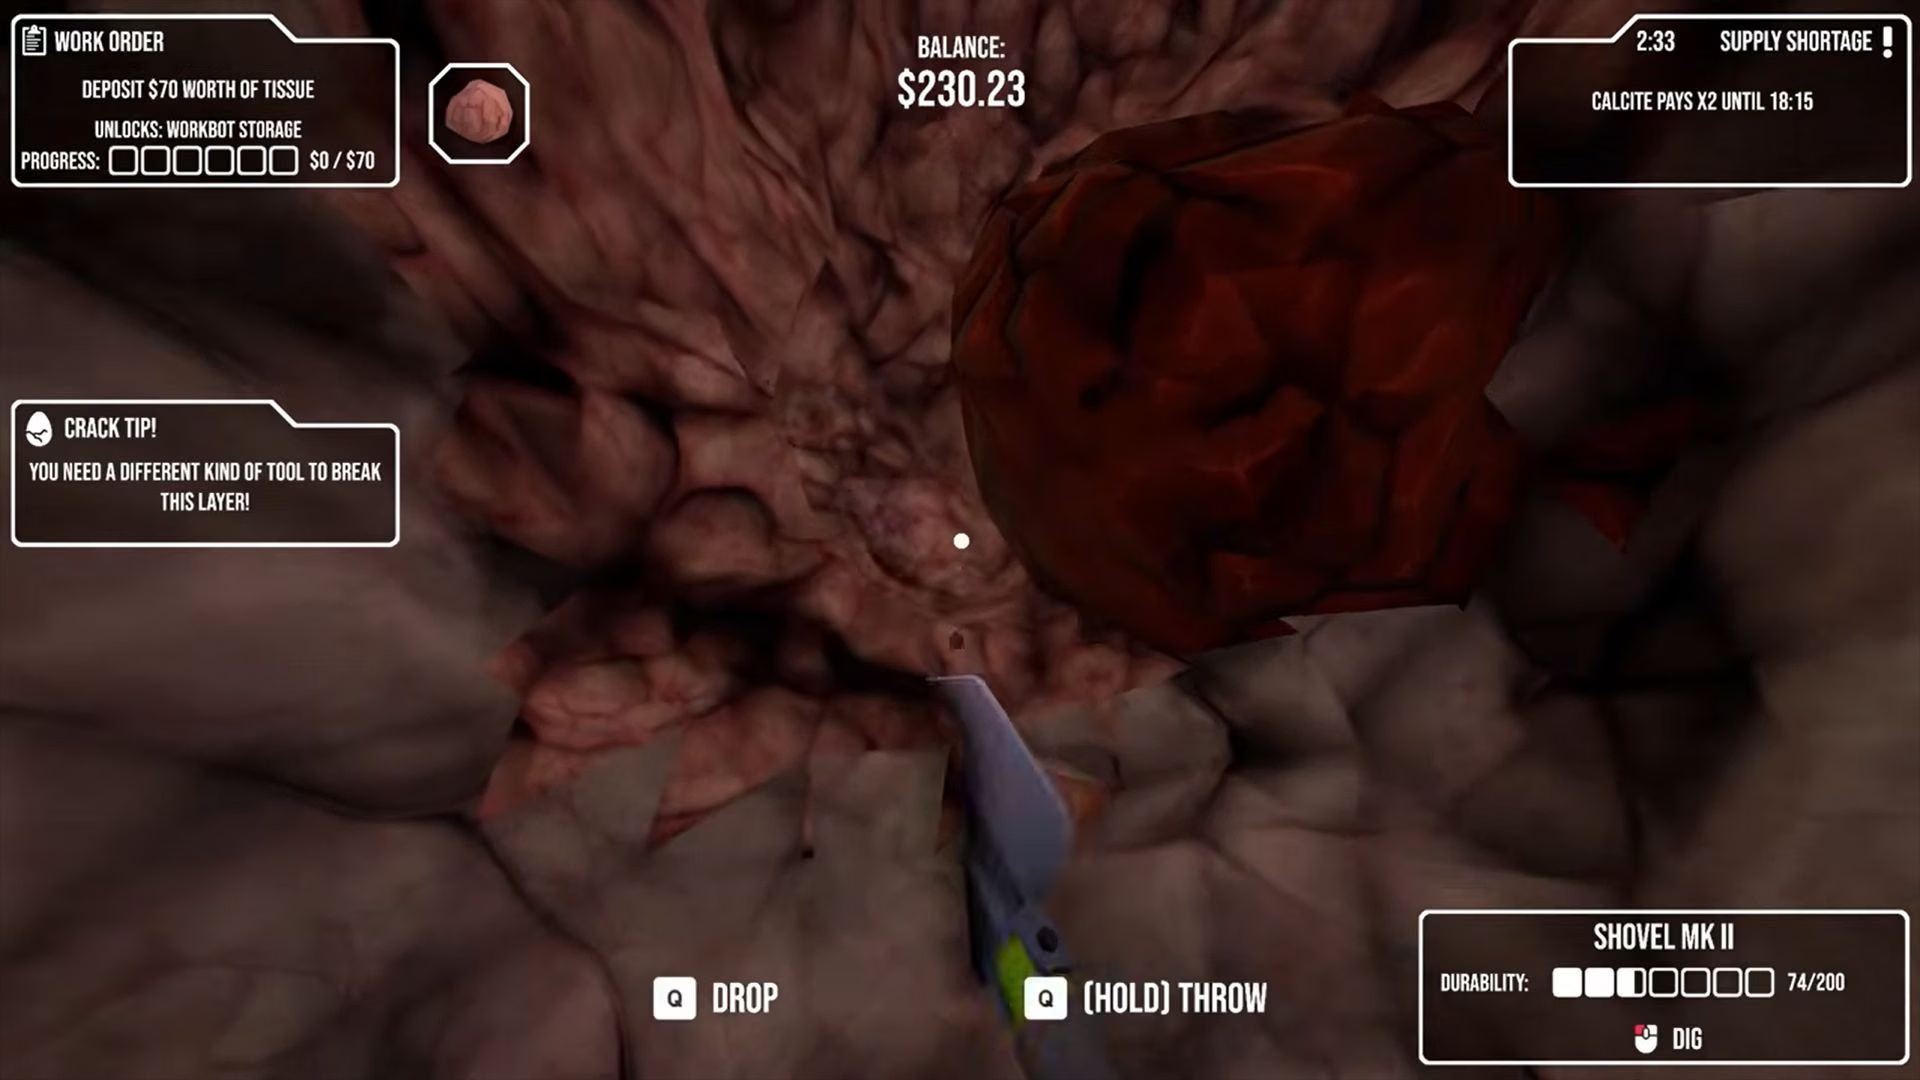
Once you go past the greyish Membrane section, you unlock the pink Tissue section of the egg. Depositing $70 worth of Tissue will unlock the Workbot Storage.
5) Purchase your first Workbots and start automating tasks

Workbots are how you automate collection and deposit tasks in CRACK, letting you completely focus on excavating. Once you have unlocked workbots, progress becomes faster and smoother.
Purchasing Workbots can be costly; for example, the first Collector Bot costs $100, the next one costs $150, and the third costs $200. The cost increases as you purchase more. The same goes for Delivery Drones.
Collector Bots find empty buckets and fill them up with excavated materials, while Delivery Drones take the filled up buckets and take them to the Resource Depot.
Both of these Workbots work autonomously and do not require any commands; you cannot order them to perform specific tasks.
6) Repairing and upgrading Workbots (farming Chalazite)

In CRACK, Workbots can break down during operation and stall the work. You will need to use a wrench to repair them. Upgrading them is a different story, as it can’t be done using money. The only way to upgrade a Workbot is to use Chalazite.

To find Chalazite, you will need to upgrade the Scanner’s scan depth and sensitivity. Different colours of Chalazite provide different upgrade amounts, and the bots have a maximum of 5 upgrade levels.
So if you get Chalazite, do not sell it. Keep it stored for upgrading purposes.
CRACK: Egg/Specimen reactions
In CRACK, sometimes the Egg will begin to get agitated, an event that usually happens when you excavate the same spot over and over again. Continuous agitation will eventually trigger a reaction event. There are around seven different types of reactions that can trigger. Here are some of them:
1) Tentacles: The laboratory will turn red while multiple tentacles begin to emerge from the egg.
2) Magnetic Field: The egg activates a magnetic field around it which attracts all loose metallic items like tools and can also break down scaffoldings.
3) Bugs/Parasites: Various types of bugs or parasites begin to emerge from the egg.
4) Eye Anomaly: A large eye appears on the egg.
5) Tremors: The egg causes tremors, breaking down scaffoldings.
6) Flooding: Pressure lines rupture and cause the laboratory to flood.
7) Regeneration: The egg regenerates all excavated parts, forcing you to start over.
How to manage egg reactions
Here are some steps that you can take to have the egg under control:
- Check the central terminal to monitor the egg’s conditions.
- Spread out your excavation work across the egg to avoid putting stress on a singular point.
- Use sedatives whenever the pop-up appears.
- Use Support Spokes on excavated areas to stop them from regenerating during a reaction.
Whenever a reaction happens, focus completely on neutralizing that before resuming your regular tasks.
CRACK: How to uncover the mystery of the facility (redacted room)
1) Find the UV Flashlight

To find the UV Flashlight in CRACK, you will first need to unlock Custom Scaffolding. Once you have the Custom Scaffolding, construct upwards until you have reached the ventilation shaft above the Breakroom.
Use the hammer to hit the screws of the panel to open the path. Enter the shaft and pick up the UV Flashlight. Do not immediately leave, walk up to the end of the shaft to find a dead member from one of the last crews. Pick up the clipboard near him to learn more about the facility.
2) Use the UV Flashlight to find the code for the locked room
In CRACK the password changes for every player, so you can’t open the gate using any other code but your own. But fortunately for you the location of the codes remains the same. Here’s where you can find the code:
1) The first two digits can be found on the right side wall of the Breakroom area with the slot machines.
2) The second two digits are located near the right side wall of the Vehicle Bay.
3) The last two digits are located right above the keypad of the Redacted Room.
Once you have all the code fragments, simply put in the code to unlock the Redacted Room.
While it does not directly affect any of the endings of CRACK, it offers the most information about the facility.
CRACK: Both endings and how to get them
CRACK has two endings. Here’s how to get them both:
Ending 1: Process the Specimen
This is the ending where you follow what the laboratory wants you to do by completing the final assignment.
Here are the steps:
- Locate the Core Specimen.
- Find the Containment Sac inside the egg.
- Secure the Core Specimen before progressing to processing.
- Enter the Processing Chamber and insert it in the designated spot.
- After it is processed, dispatch the product.
Completing these steps in the endgame will result in you getting the Reach 1/2 Ending tag.
Ending 2: Escape via the secret exit
This is the second ending where you ignore the demands of the facility and proceed to escape with the specimen.
Here’s how you do it:
- Find the hidden messages in the ventilation shaft and the Redacted Room to learn about the secret exit.
- Use the hammer to break down the boards blocking the exit.
- Enter the room and read the clipboard on the ground to learn about the blocked off passage behind the dirt.
- Use your tools to break down the dirt to uncover the stairs leading up.
- Once you have reached the upper section, you will find a locked door that will only open in the presence of the Specimen.
- Secure the specimen and bring it to the locked door.
- The door will open and you will get the second ending.
CRACK: All achievements
Here are all the achievements of CRACK:
1) First Crack = Crack the outer shell.
2) Automation = Power on a workbot.
3) Hit and Run = Run over a coworker with a vehicle.
4) Tenure = Work 10 shifts.
5) #1 Plumber = Fix all burst pipes.
6) Struck Gold = Break a chunk off a Gold Geode.
7) Nice and Tidy = Pass a workplace inspection.
8) Swallowed = Get pulled in by a tentacle.
9) Corrective Action = Fail a productivity audit.
10) Audit Passed = Pass a productivity audit.
11) Professional Intern = Get a 10% Dream Bonus on a $0 profit.
12) Burst Vessel = Burst an Artery Sack.
13) IT Specialist = Repair 10 Workbots.
14) Hot Potato = Hold on to a parasite a little too long.
15) Overclocked = Fully upgrade a Workbot to max level.
16) High Score = Score 10,000 points in Eggsteroids.
17) Explosive Personality = Get caught in the blast of your own dynamite.
18) EGG: Containment Breach = Break through the Containment Plating.
19) Yolked = Break open the yolk sack.
20) Egg on Your Face = Hit a coworker in the head with an egg.
21) Jackpot = Get the max payout on a slot machine.
22) Seized Assets = Lose more than half your money to a wealth redistribution.
23) Nothing But Net = Score 10 baskets in the breakroom.
24) Great Asset = Earn $10,000 for the Company.
25) Fashion Police = Buy all lab coat colors.
26) Team Player = Transfer $1,000 to a coworker.
27) Out Cold = Fall 10 meters after the sleep gas knocks you out.
28) Well Rested = Sleep in your quarters every night.
29) Get Back to Work = Get a score of 50,000 in Eggsteroids.
30) Structural Collapse = Go down with the scaffolding during a collapse.
31) Pest Control = Squish 25 beetles.
32) Junkie = Try every pill type.
33) Arcade Master = Beat a coworker at every two-player arcade game.
34) Snake Whisperer = Play a perfect game of Snake.
35) Well Done = Deliver the specimen.
36) Bad Listener = Enter the Do Not Enter door.
37) Cold Case = Open the suspicious vent.
38) Access Granted = Gain access to the [REDACTED] room.
39) Free Range = Help the specimen escape.
40) Paper Trail = Find every clipboard.
Read more Esports and Gaming guides here:
Are you stuck on today’s Wordle? Our Wordle Solver will help you find the answer.
Edited by Jagaran Dutta


